Understanding the Basic Template Editor
NEW: Watch the short How-To video series, including Creating Your First Template >
The basic template editor in Swiftpage emarketing
is designed for customers that
have limited HTML design
experience, but would like to customize their
professional email templates. Swiftpage emarketing
provides
a number of Email
Templates that can be customized using the Basic Editor.
When you enter the Swiftpage emarketing
Basic Template Editor, you will see your template in the middle,
and menus to the top and left of it:
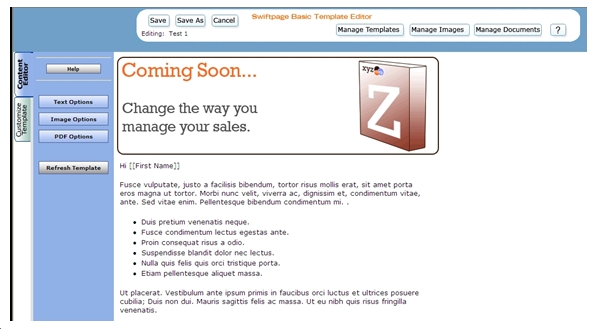
The menu buttons in the top navigation pane perform the following functions:
Save: saves the template in its current form. Note: you must save a template before you can edit another template.
Save As: saves the template under a new name (that you can determine), thus creating a copy of the template.
Cancel: cancels any changes you have made in the current editing session and returns you to the Template Manager screen.
Manage Templates: returns to the Swiftpage emarketing Template Manager screen.
Manage Images: opens the Swiftpage emarketing Image Library in a new browser tab or window. The Swiftpage emarketing Image Library can be used to upload, store or delete images to be used in future templates.
Manage Documents: takes you to the Swiftpage emarketing Document Library, where you can upload, store or delete PDF documents to be used in future templates.
On the left-hand side of the screen, you have two tabs: Content Editor (pictured above) and Customize Template (see #4, below). The Content Editor tab offers you these functions:
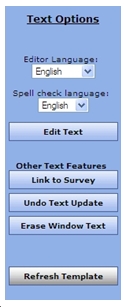 Text Options: the text options screen offers you several options:
Language: change the language for the text editor buttons and/or the text editor spell check.
Edit Text: opens the text editor, where you can type and format the main body of your text, insert text hyperlinks, and so on.
Link to Survey: link text in your template to one of your Swiftpage emarketing templates.
Undo Text Update: undo the last change you made in the text editor.
Erase Window Text: click here to erase all of the text in the selected Swiftwindow.
Refresh Template: displays the most current version of the template.
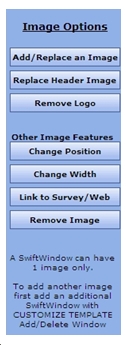 Image Options: perform these functions from the image options screen:
Add/Replace an Image: click here to add an image to your template or replace an existing image. You will be prompted to select an image from your Image Library or upload a new image.
Replace Header Image: offers you the ability to replace the header image in your template (the image at the top that spans the entire template) with a new uploaded image or an image from Swiftpage emarketing ’s Header Library.
Remove Logo: if you have defined a company logo to appear in your Swiftpage emarketing template (under the “Your User Profile” area of My Swiftpage emarketing ), this button will remove the logo permanently from your template.
Change Position: allows you to change the position of your image within the window in which it resides. You can place an image at the center top (above text), left or right (at the top, next to text), or bottom (below the text).
Change Width: allows you to change the width of your image, in pixels. (The height changes proportionately.)
Link to Survey/Web: create a link from your image to a URL or one of your Swiftpage emarketing surveys.
Remove Image: takes the image out of the window entirely.
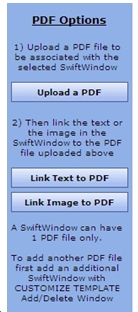 PDF Options: the PDF options screen takes you through a two-part process:
Upload a PDF: upload your document to the window you select. After you do this, you must link your PDF either to text or an image in the same window.
Link Text to PDF: allows you to determine which text in your Swiftwindow you wish to link to your PDF.
Link Image to PDF: allows you to link your PDF document to the image in your Swiftwindow.
The Customize Template tab offers you the following options:
Set Column Width: determine the width of the left-hand column in your Swiftpage emarketing template. The full template width for Swiftpage emarketing templates in the basic editor is always 600 pixels, and each template has two columns. Set the left column width at 300 pixels, therefore, to have two columns of equal size. Set it at 400 pixels to have one column twice as large as the other, and so on.
Background Colors: click here to define the background colors for windows, columns, or the entire template.
Horizontal Lines: this allows you to insert a horizontal line above any Swiftwindow.
Add/Delete Window: this function allows you to add a Swiftwindow, delete a Swiftwindow, or duplicate a Swiftwindow. Note: you cannot delete the top Swiftwindow in a column.
Move Window: allows you to move a window with reference to another window (i.e. make one window move so it is above another window rather than under it).
Lock/Unlock Window: allows you to lock a Swiftwindow so that no changes can be made to it, or unlock previously locked windows.
Refresh Template: displays the most current version of the template.