Snapshot by Swiftpage emarketing Help
Swiftpage emarketing
for ACT! is an integrated email marketing and sales force automation
solution. By being integrated, Swiftpage emarketing
allows a user to send directly from ACT!
to any contact, group, look up or company and writes each action back into history
for future reference. Swiftpage emarketing
’s Sales force automation component is called
Snapshot and helps the sales person know who to send email to, know who to
call based on the recipients interaction with the email campaign and know what
to talk about once they have them on the phone.

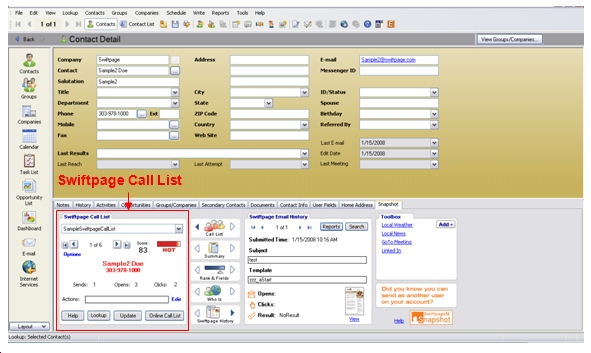
Panes: The Snapshot tab is broken up into different “panes” for ease of use. All of the panes contain different functionality, and are described in detail below.
Jump to:
Swiftpage emarketing
Call List | Summary | Rank & Fields | Who Is | Swiftpage emarketing
Email History | Toolbox
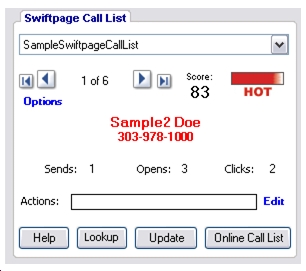 Swiftpage emarketing
Call List
Swiftpage emarketing
Call List
Update button: The Update button launches the online Call List Manager, which allows you to access any Call Lists you have already created, or create a new Call List. If this is your first time using the Call List, click here to create a new Call List from your email campaigns.
Online Call List button: Links out to the Call List you are currently synced to.
Lookup button: Gives you the ability to create an ACT! Lookup or Group from any Swiftpage emarketing Call List. Click the Lookup button, select your filters, and create your Lookup or Group. ACT! Lookup created from a Call List can be automatically ranked in the order of your Call List. For more help regarding Call List Lookup and Group, see the Call List Lookup Help document.
Options button: Gives you access to options regarding Call List scrolling. The options dialog is shown below. For more information see our Call List Lookup Help document.
Swiftpage emarketing Call List | Summary | Rank & Fields | Who Is | Swiftpage emarketing Email History | Toolbox
 Summary
Swiftpage emarketing summarizes standard ACT! features to give you quick access to important contact information.
Next ACT! Activity: Here you are able to view the Next Activity you have planned for that contact. You are also able to create a New Activity by clicking the “New” button, or edit a current activity by clicking the “Edit” button.
Last History: Here you are able to view the last ACT! history recorded for that contact. You are also able to create a new history by clicking the “New” button, or edit the last history by clicking the “Edit” button.
Last Note: Here you are able to view the last ACT! Note recorded for that contact. You are also able to create new Notes by clicking the “New” button, or edit the last note by clicking the “Edit” button.
Opportunity: Here you are able to view the Opportunities for that contact. You are also able to create new opportunities by clicking the “New” button, or edit a current opportunity by clicking the “Edit” button.
Coach: The coach button takes you out to the World Wide Web to view coaching tips for your sales team from sales coaching professionals. Depending on your Opportunity Stage, you may be able to find very relevant information to increase the chances of closing a sale.
Swiftpage emarketing Call List | Summary | Rank & Fields | Who Is | Swiftpage emarketing Email History | Toolbox
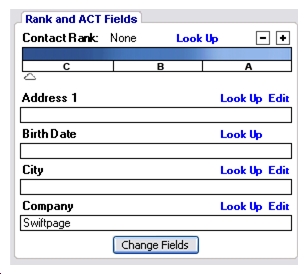 Rank & Fields
Contact Rank: Contact Rank provides another searchable ACT! field that allows you to Rank your contact based upon any factor you choose. Just “drag and drop” the slider bar, or use the plus/minus buttons to give your contact your personal score.
Look Up: Clicking the “Look Up” will launch ACT!’s Lookup feature with the appropriate ACT! field already selected.
Fields (Change Field button): Fields allow you to view any ACT! field in your database. Click the “Change Field button” and select the field that you wish to view.
Swiftpage emarketing Call List | Summary | Rank & Fields | Who Is | Swiftpage emarketing Email History | Toolbox
Who Is
 Search: The search button allows you to search the world wide web for your Call List contact.
The first 2 boxes in the Who Is Search hold the contacts Name and Company.
The text in these 2 boxes is passed through to each search engine on each search. Narrow Search passes both the Name (first box) and the Company (second box) of the contact. Broad Search passes either the Name or the Company depending on which search is being performed.
Person Search: searches Google, Yahoo!, MSN Live, and Snap for the contacts name and/or company depending on Narrow or Broader Search.
Image Search: searches Google Images, Flickr, Yahoo! Images and MSN Live Images for the contacts name and/or company depending on Narrow or Broad Search.
 Blog Search: searches Technorati, Google Blogs and Bloglines for the contacts name and/or company depending on Narrow or Broad Search.
Podcast Search: searches Pluggd.com and everyzing.com for the contacts name and/or company depending on Narrow or Broad Search.
Video Search: searches youtube.com, Yahoo! videos, AOL videos and Google videos for the contacts name and/or company depending on Narrow or Broad Search.
Company Search: searches Google, Yahoo!, MSN Live, Snap and Zoom for the contacts company.
Map: searches Google maps, Maps.Live, Mapquest, and Yahoo! Maps for the contacts address.
All: Searches 1 search engine from each category (Person, Image, Blog, Podcast, Video, Company, and Map search).
Person, Image, Company Search: searches for the person, and image of the person, and the company.
Edit: The Edit button located in the Who Is page allows you to add and edit images, links, and text. The Image, Links, and Text buttons will not be active until they are populated with information.
Swiftpage emarketing Call List | Summary | Rank & Fields | Who Is | Swiftpage emarketing Email History | Toolbox
 Swiftpage emarketing
Email History
Swiftpage emarketing
Email History
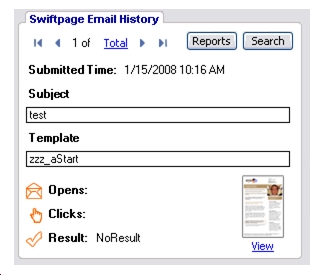
1 of “total”: By clicking on the “total” link, you will be able to see how many Swiftpage emarketing emails you have sent your contacts. If it has been less than 60 days since you sent the email, the email you sent is available to view. To view the email, click the “View” link near the bottom of the pane.
Reports button: Provides instant access to your online Swiftpage emarketing reports.
Search button: Allows you to search your ACT! database for unopens, opted-outs, duplicates, invalid and bounced email addresses. See our ACT! Search Help document.
The rest of the fields in Swiftpage emarketing Email history give you information about the specific email you sent. You can view the Subject, the template name, how many times it was opened, how many times they clicked on a link within the email and the Result.
Note: Opens, Clicks and Results that are viewed in Swiftpage emarketing Email History are data scores that can be downloaded via the “Get Results” button in the Swiftpage emarketing E. These data scores are updated nightly and can be downloaded daily. Please note that the Swiftpage emarketing Call List can be updated as often as you choose, where as “Get Results” scores are updated only once per day. Due to the Real-Time feature of the Call List, your Call List and Swiftpage emarketing Email History may not show the same number of email opens and clicks.
Swiftpage emarketing Call List | Summary | Rank & Fields | Who Is | Swiftpage emarketing Email History | Toolbox
Snapshot Toolbox
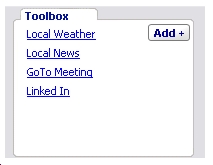 Links: The Snapshot Toolbox contains up to 7 web links. You can customize all of the links by clicking on the “Add+” button. The Snapshot toolbox is designed to give you access to your best sales tools; just 1 click away.
Add Tools: The Add Tools button takes you to a webpage where you are able to select from a variety of Sales Tools, and you are able to create your own custom tools to sync into ACT!. In the left window of the Online Toolbox, select which Sales Tools you would like to use by selecting the check box to the left. You may only select 7 tools to submit. Click the Submit button near the bottom of the window. Close the browser. Back in ACT!, press the “Sync Tools” button to update your Snapshot Toolbox links.
 Creating Custom Tools: To create custom tools, from ACT click on the “Add Tools” button to launch a web browser. Once at the website go to the custom tools page by clicking the link in the bottom right corner. In the entry boxes enter a name for you new link and a valid URL. Click the submit button. Go to the left window and select the custom tool you just created. Click submit, then go back to ACT! and click “Sync Tools”. Your new custom tool should be available.
Swiftpage emarketing Call List | Summary | Rank & Fields | Who Is | Swiftpage emarketing Email History | Toolbox