The Swiftpage emarketing Call List - View Assignments
After creating a Swiftpage emarketing Call List, your Sales Team members can now view the assignments they have been given.
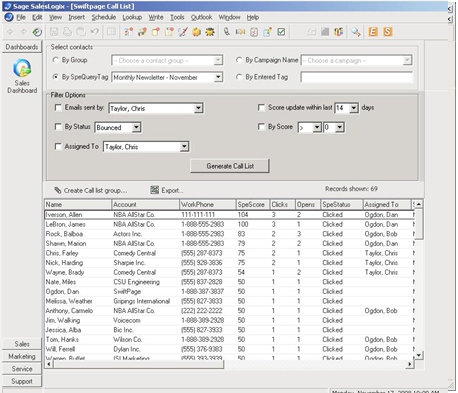
Select Contacts
First, select the Group, Query Tag or Campaigns Name that you would like to view the Assignments.

After selecting the contacts to include in the search, the next step is to choose the filter option for the Call List.
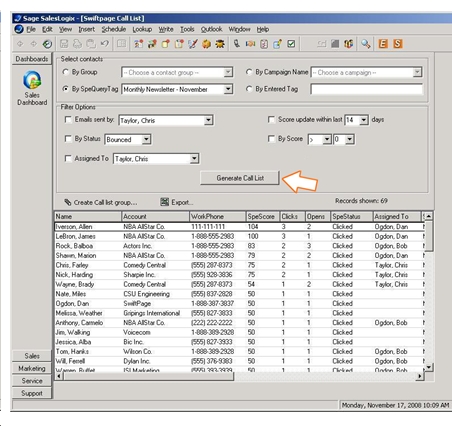
With the contact selected and the options for the search checked, click on Generate Call List.
The Swiftpage emarketing Call List will contain all contacts that meet the criteria of the search. The information in the Swiftpage emarketing Call List is as follows:
Name – is the name of the contact.
Account – is the account that the contact is a part of.
Work Phone – is the contacts work contact number.
SpeScore – this is a value generated by the number of opens and clicks for the particular email blast.
Clicks – are how many times a link within the email was clicked by the contact.
Opens – are how many times the email was opened by the contact.
SpeStatus – this is the status of the contact. The statuses are as follows:
-Bounce- this status if for and email sent and was not delivered because it bounced.
-Clicked- is that status for when an email was opened and the contact clicked on a link inside the email.
-Duplicate- is for a contact that might have been listed multiple times in a list of contacts that the email was sent to.
-Failed- a bad email address which failed in the process of sending the email.
-Invalid- states that email address for the contact sent to is not a valid email address.
-Opened- is the status when a contact opens the email.
-Opted-Out- states that the contact that received the email has Opted-Out of future mailings.
-Suppressed- states that the contact is on the accounts suppression list and emails cannot be sent to that contact.
-UnOpened- is when the email has been delivered but the contact has not opened the email.
Assigned To – is the SalesLogix user or Swiftpage emarketing user that the contact is assigned to.
SpeQueryTag – this is the query tag that is assigned to the Email Blast. In completing the send; there is a dialog box for Update History or Skip History. With updating history, a SpeQueryTag is used to create Call List. The user can search for that specific SpeQueryTag and pull all the information for that Email Blast for each contact that was included in the send.
Activity Date -
Template Name - is the template that was sent out to the contact.
Subject - this is the subject line that the contact first sees when they receive the email.
City, State, and Postal Code